Making an impression
The image slider on the home page of the website is the first thing most users will see, so its important for making a good first impression as well as a great place to get their attention. This page will tell you how to add and edit slides to the homepage.
Adding a New Slider
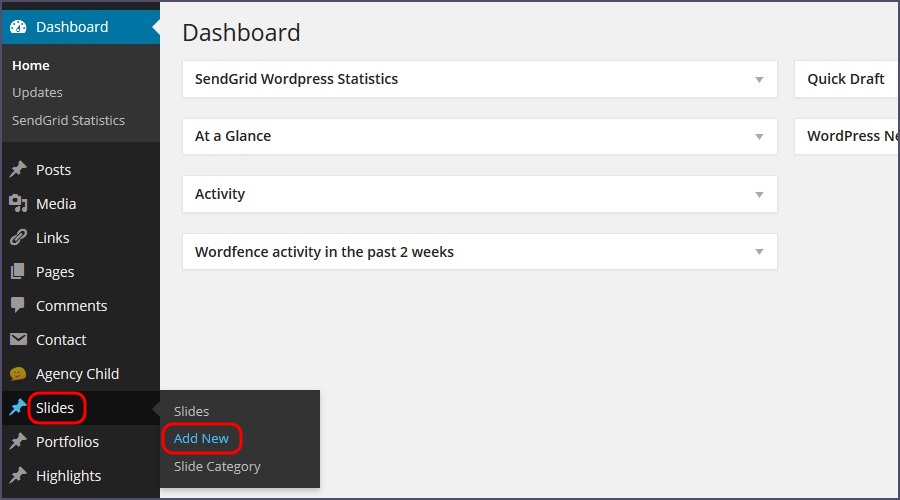
From the dashboard go to Slides > Add New
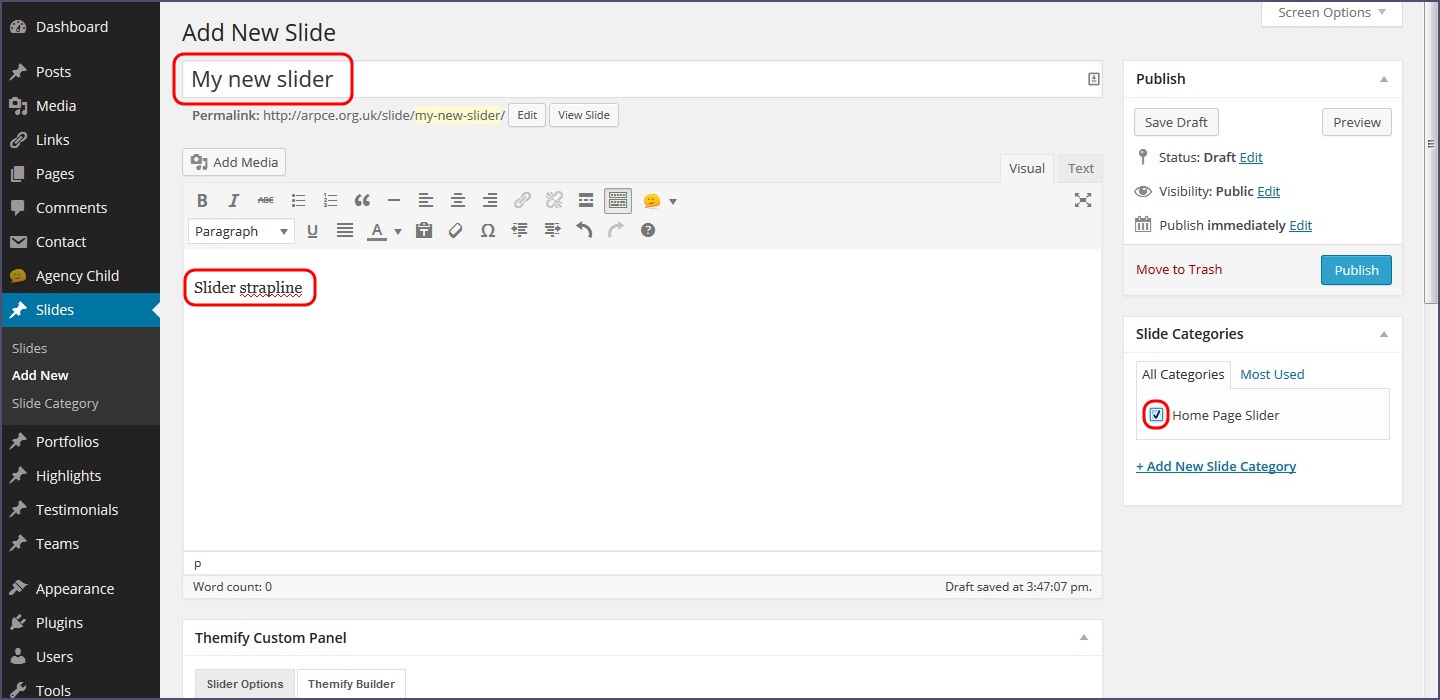
Enter a Title for the new slide and some text for a strapline in the main content area:
For reference, you can see how these will be laid out in a finished slide

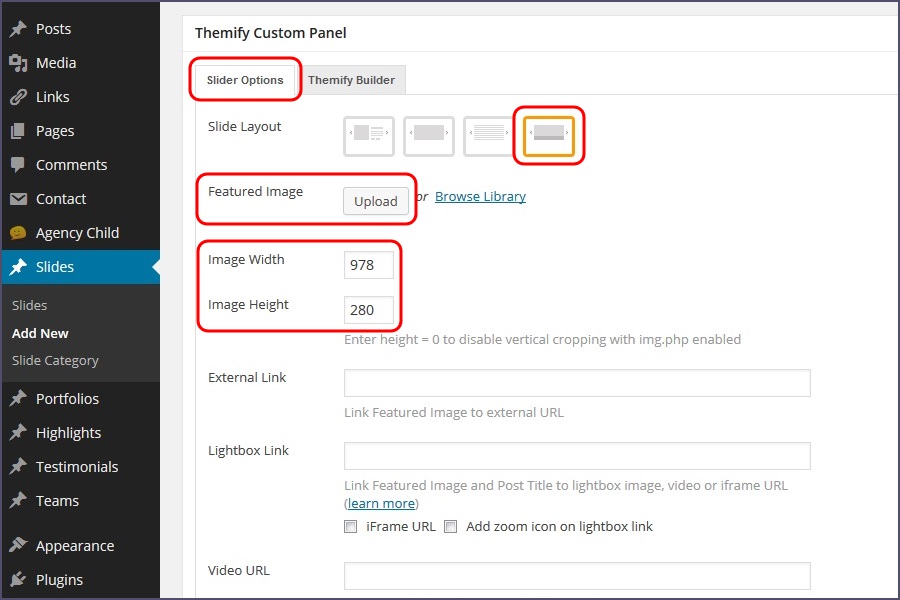
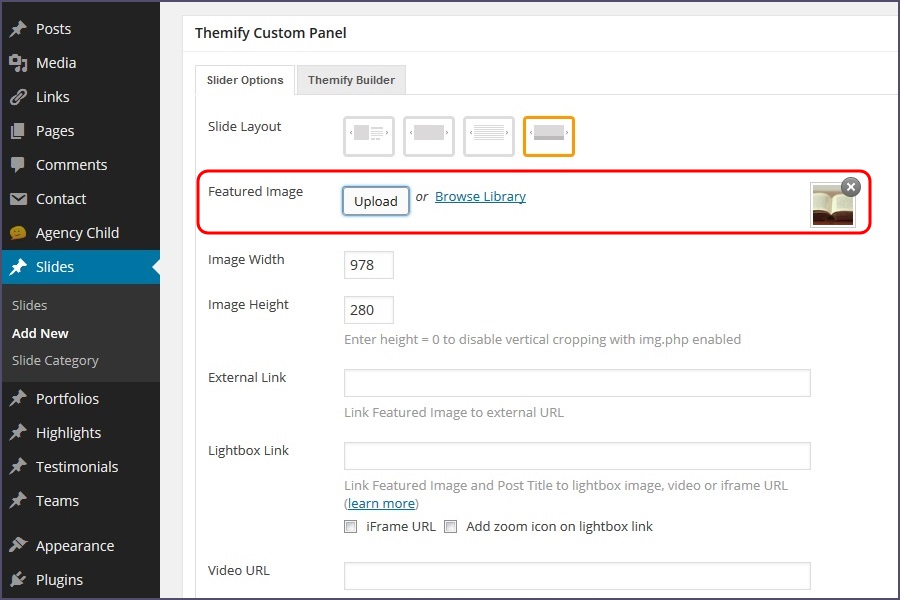
Next you will need to scroll down the page and click on the Slider Options tab as shown below. Choose the right-most Slide Layout (highlighted below) and enter the width and height values shown - Image Width: 978, Image Height: 280.
Then, click on the Upload button to select your image for the slide.
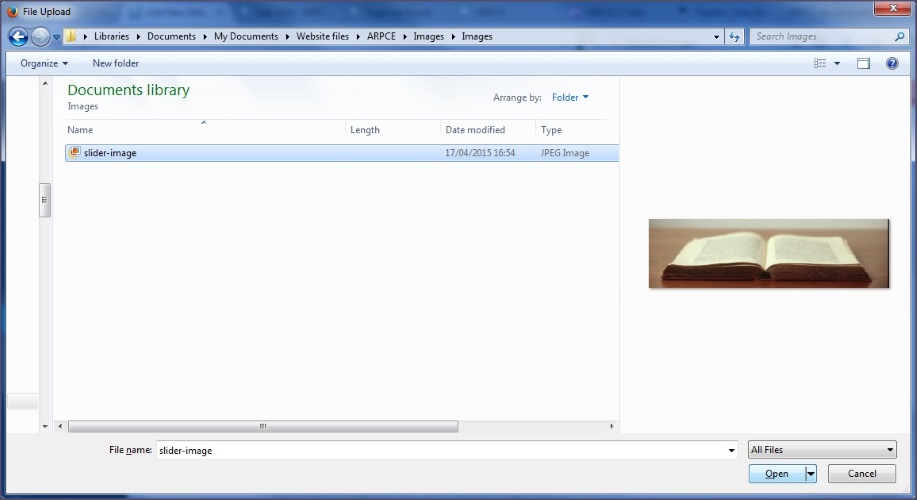
This will bring up the file browser window for your computer where you can navigate to the image you would like to use and hit Open.
For best results, ensure your image file is 978 x 280 pixels (w x h). This is the preset size of the slider, and using images with other dimensions could lead to unexpected results.
Once uploaded, you will see a small thumbnail of your image to confirm it is successfully loaded.
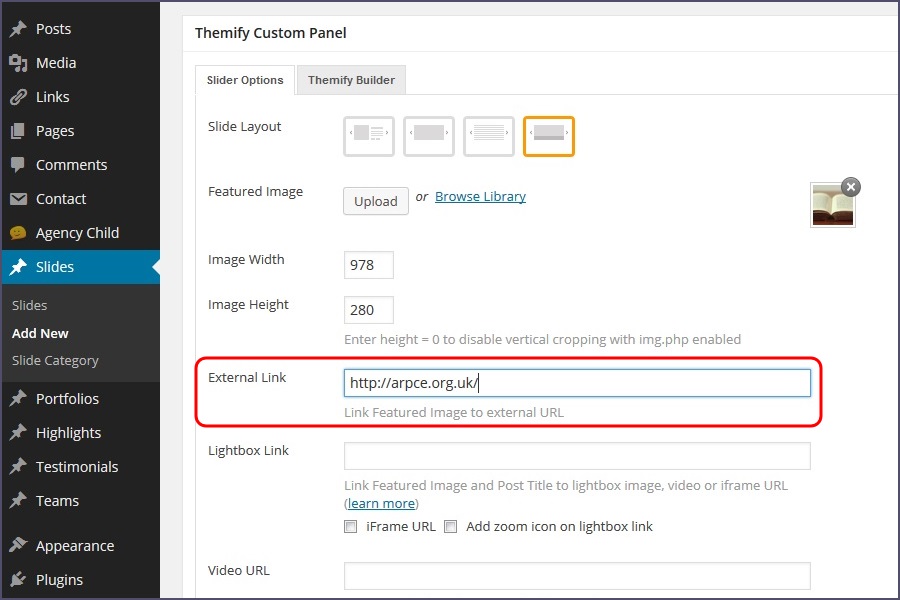
Now enter an External Link for the slide - this is the URL that you want the slide to link to. This will likely be a page or post already on the site e.g. http://arpce.org.uk/members or http://arpce.org.uk/details-of-an-event etc.
Finally, you will need to select the check box for Home Page Slider in the Slide Categories box (on the right hand side of the page). This lets the home page slider know that this slide should be displayed there too.
Once added, hit Publish to create your new slide.

If you navigate to the home page, you will now find your new slide within the slider:
